
We're really excited about this one! 🤩 Your reports have been given a huge upgrade with more tools and functionality to make it quicker & easier to find and view your data in this Reckon One update!
Check out the full inclusions of this release below 🙂
✨ Report upgrades now available! (Beta)
Your reports in Reckon One have been enhanced with a range of new features which are now available for you to enable! These upgrades provide a more flexible and interactive report experience with a new grid layout, customisable columns, presentation options, improved filtering & sorting, and the ability to quickly search for specific data within reports.
Check out some of the new features in more detail by expanding each section below!
In each report, you are able to select various report options, including filtering the report, choosing data to show or hide, and selecting reporting basis. Not all options are available for every report, but here are the common ones:
Filter your report
You can filter a report to narrow the data that's shown, and see only the data you need. Depending on the report and the features you have enabled in your book, you may be able to filter by item, account, project, customer, supplier, employee, classification, or other types of data.

Show or hide information
You can show or hide specific columns from your report simply by toggling which columns to display.

Adjust display options
Report display options include things like row heights, grid lines, shading and highlighting of negative amounts and links, as well as report-specific options such as display options for sub-accounts.

Change reporting basis
You can change the reporting basis (cash or accrual) if required.

You can filter within columns by typing into the field at the top of a column. Data will filter to anything that exactly matches what you type.

You can search for a specific piece of data within a report such as a reference code, number, or keyword.
When you click in the search bar and type, the report will then be filtered to only show line items that match what you typed.

You can simply drag between column headers to make them wider or narrower on-screen.

The column menu button (3 dots next to the column name) gives you additional options including autosize options.
- select Autosize this column to autosize a specific column to the size of the cell contents
- select Autosize all columns to resize all columns to fit the grid width.
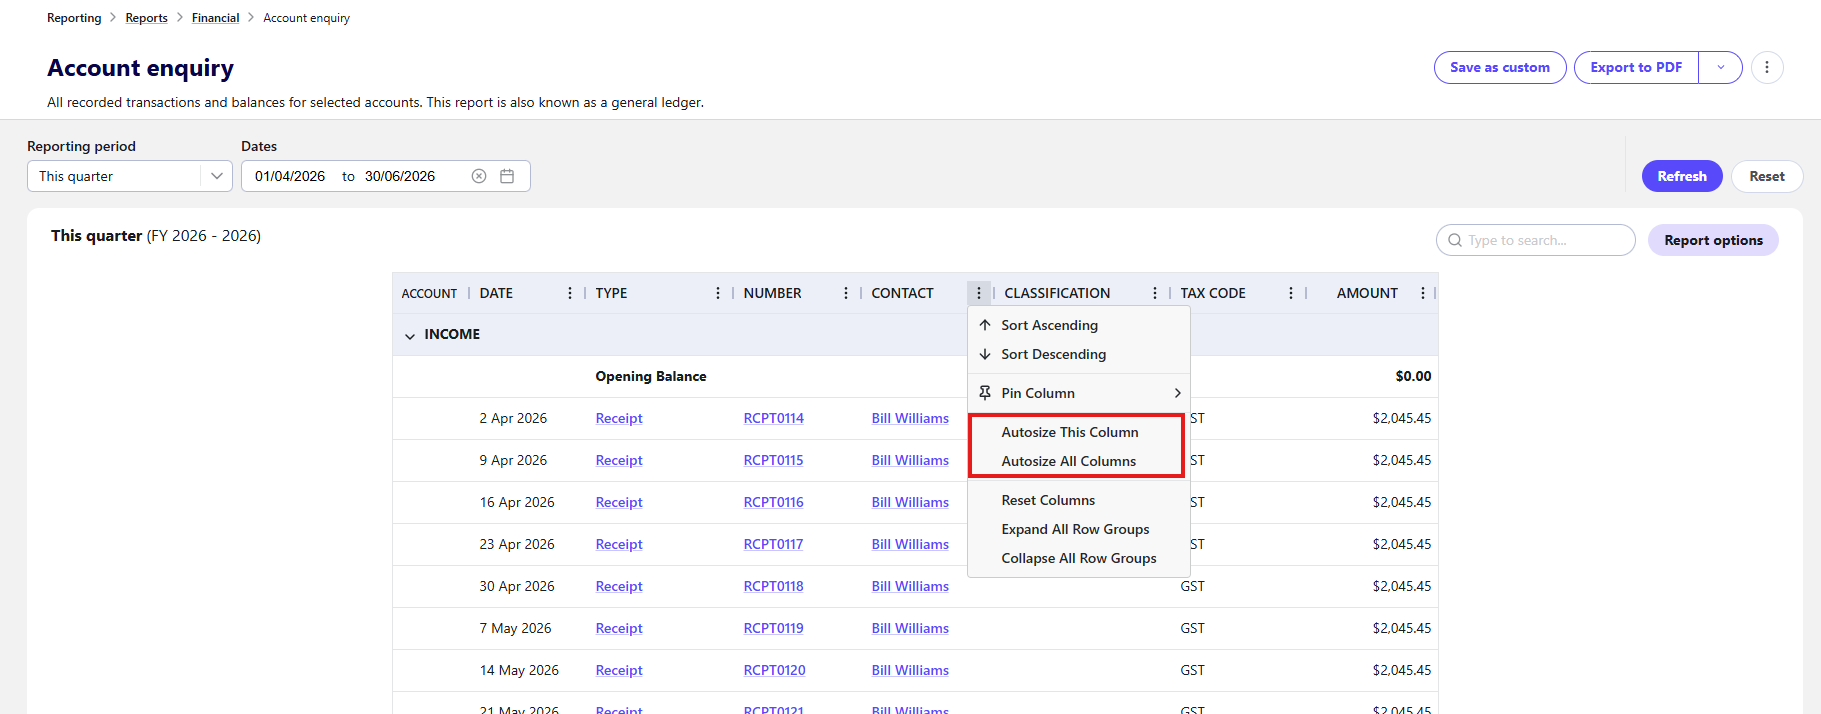
To sort the data in a column, you can:
- click on the column name to first sort by ascending, then descending, then if available, by the default order (which varies between reports).
- click on the column menu (the 3 dots next to the column name), then select the preferred sorting option for the column.

⚠️ Please note: Some reports may not support column sorting due to the structure of the report
To pin a specific column so that it is always visible as you scroll the report:
- Click on the column menu (the 3 dots next to the column name)
- Select Pin column.
- Select Pin Left or Pin Right.
To unpin a column, click on the column menu (the 3 dots next to the column name), select Pin column, then select No pin.

Simply drag columns to the order you wish then refresh your report and your columns will be reordered.

On selected reports you'll have the ability to the view full detail of the report using the Detail tab or alternatively get a condensed summary via the Summary tab.

You now have more options when it comes to exporting your reports to PDF with settings that can be managed globally or customised for individual reports!
Available options include:
- Page size and orientation (portrait or landscape).
- Page margins
- Display settings aligned with the report grid view.
- Configurable headers, report names, notes, footer text, and header alignment.
- Multiple scaling options:
- No Scaling (default): Exports the report at its original size without adjustment.
- Fit All Columns to Page: Automatically scales content so all columns fit on a single page.
- Smart Page Breaks: Repeats key identifying columns, such as Date or Account, across pages to maintain context when reports span multiple pages.
How do I enable the new report features?
When you open a report, you'll see a banner inviting you to switch on the new report experience. Simply click the button and the new report experience will be enabled for all your reports 🙂

Give us feedback
We really want to hear what you think, if there's anything you like, dislike, think can be improved or want to see included, let us know! You can share feedback below using the share your feedback link on the report page.
✨ Your Journals list has been upgraded!
We've steadily been upgrading screens in Reckon One to the latest tech with more features and functionality and in this release, its your Journals list screen!
The new Journals list screen gives you more customisation options including the ability to show the columns that are important to you, and hide those you don't want to see, it also allows you to filter journal entries by date and type.

✨ Full screen mode
Looking for a little extra screen real estate? Reckon One now has a full screen mode!
This allows you to maximise your screen space for easier viewing and a more streamlined experience on selected screens. Simply click the full screen button to hide the top and left menus and give yourself more room to focus on the task at hand.

✨ Company custom fields available on Purchase Orders
If you've created any Company custom fields, you can now choose to add these to your Purchase Order template to display on any PO's you print or email.

✨ Increased max employee limit on EOFY finalisation
The maximum number of employees you can select for inclusion in an EOFY finalisation has been increased from 100 to 180. We've also updated the messaging on-screen on this.

✨ Special character validation
We've added validation that removes any special characters not accepted by the ATO from employee address and email fields which will help prevent any errors when you're submitting STP.
✨ Faster keyboard entry when adding pay run items
When adding a new row to a pay run using your keyboard, the cursor/focus will now move straight to the new row's pay item field so you can keep entering data without extra clicks.
✨ Improvements to invoice numbering
You can now change an invoice number to an earlier number provided it hasn't already been used. We've also added an enhancement so that the next suggested invoice number always skips any numbers that have already been used or deleted.
🐛 Bug Fixes
- Fixed an issue where re-adding an employee to a SuperStream batch after removing them could show an unexpected error when the employee had multiple super items on the pay run.
- Ensured a pay run could not be created with a payment date earlier than the book's start date, as previously, this made the pay run impossible to find or open. Pay runs dated before the book start date are no longer allowed.
- Corrected the STP YTD report where an issue occurred when removing a salary sacrifice super item from an employee's profile. Previously this incorrectly reduced the super guarantee total.
- Ensured when super guarantee is not calculated for a leave pay item type in a termination pay, that the leave pay item value is excluded from QE calculations.
- Fixed an issue where tabbing through fields on the pay run screen could automatically select a customer from the Customer dropdown field.
- When changing an employee's salary or variable rate within a pay run we have ensured that the usual confirmation prompt for the change is displayed.
- Fixed an issue where items linked to a project didn't appear immediately in the item list when adding them to an invoice or purchase order.
- Fixed an issue where the purchase order list was missing the column filters available on other lists such as invoices.
- Fixed an issue where company custom fields could not be added to purchase order templates.
- Fixed an issue where PayPal payments stopped syncing, leaving paid invoices showing as unpaid.
- Fixed an issue where purchase order reports showed item quantities and reorder points to 3 decimal places instead of 2.
