
Good morning everyone!
Today's #TipTuesday we will be discussing the usage of Timesheets in Reckon One.
Timesheets can help your business become more efficient and ensure accurate tracking of what your employees have completed work-wise and being able to bill clients for that work.
Let's get started
I recommend checking out the Timesheet settings from the Settings menu by clicking on the cogwheel icon in the top right hand corner of the screen, then click on Settings.
Click on Time in the Day to day settings section, click to expand Timesheets to display the settings available:
Approval process: This option allows you to enable or disable timesheet approval process.
First day of week: Select which day the timesheet work week start from.
Time options: Choose how billable time will be displayed on the invoice. When transferring the timesheet information.
Creating Timesheets
Before you start using Timesheets ensure that you have accounts, customers, items and projects (if required) set up in the book. Items must be set up as Service items to be recorded in a timesheet. You can also create account, contact, items and projects as you create the timesheet, if it makes it easier for you.
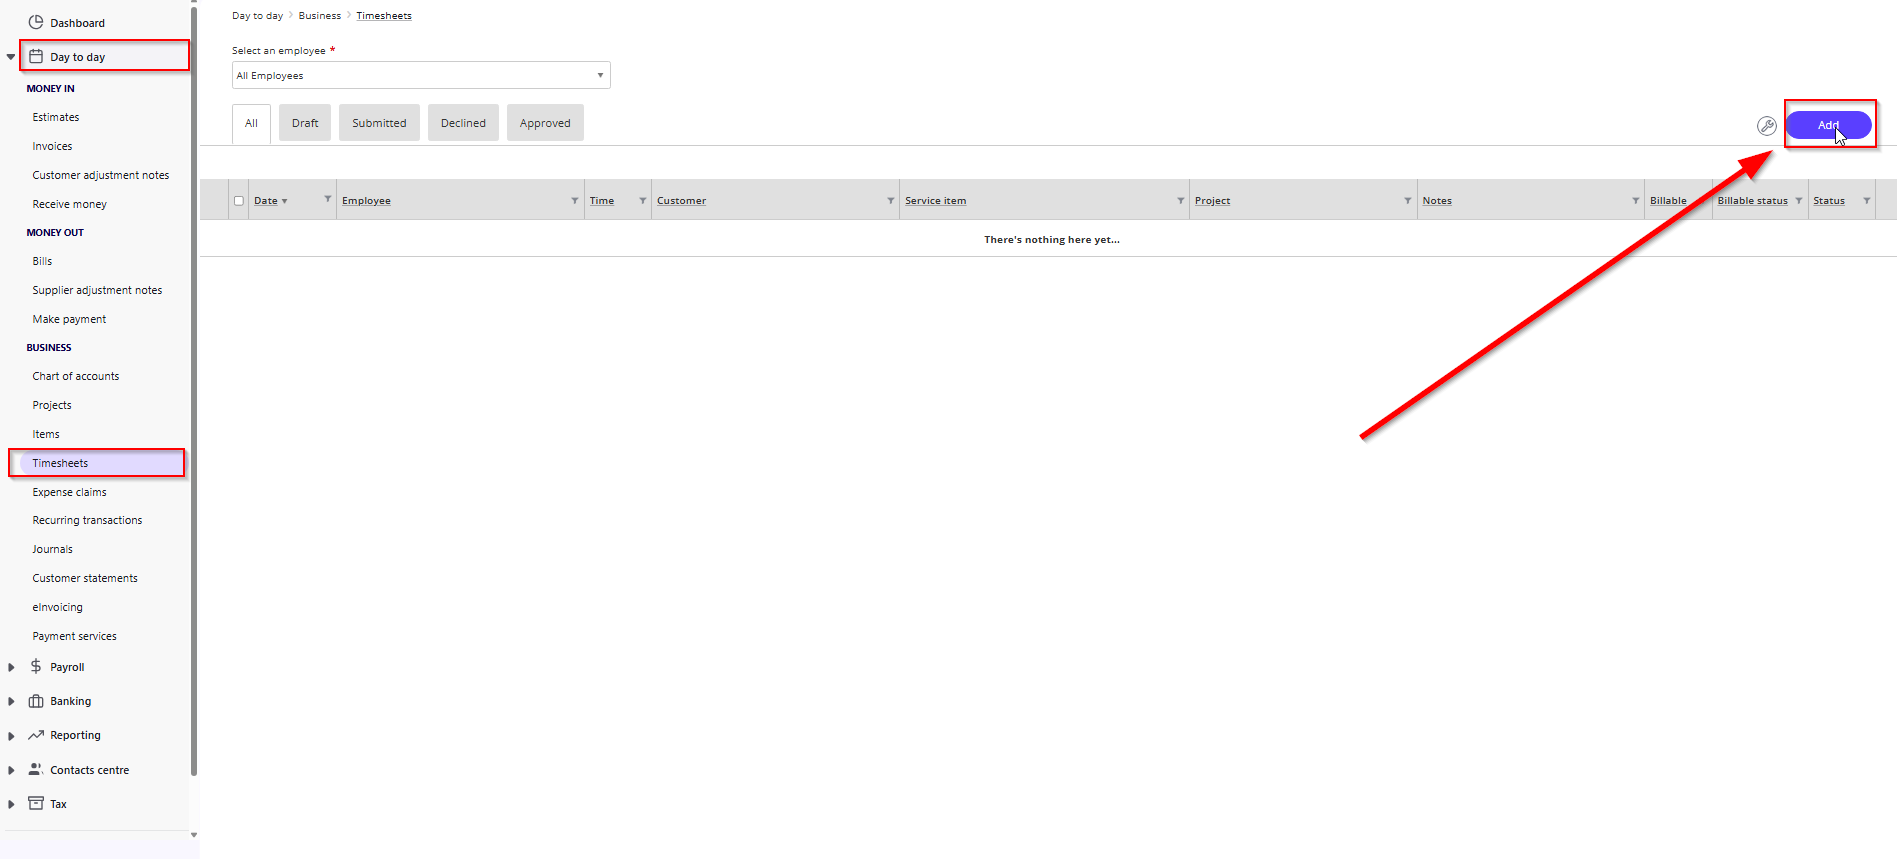
When creating your first timesheet, navigate to Day to day > Timesheets > Add
Now we can select our employee that will be undertaking the work that can be billed to the customer and adding details for tracking like how many hours your employee has worked and Pay item, Project, Classification, Customer, Service item and if it's billable or not.
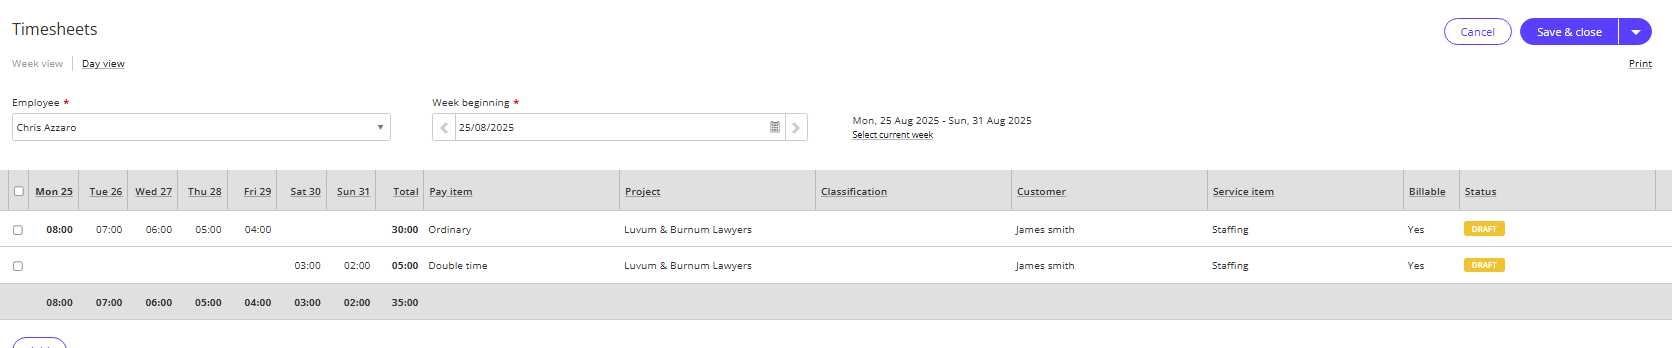
Note: You can add multiple rows if different pay rates apply for your employee.
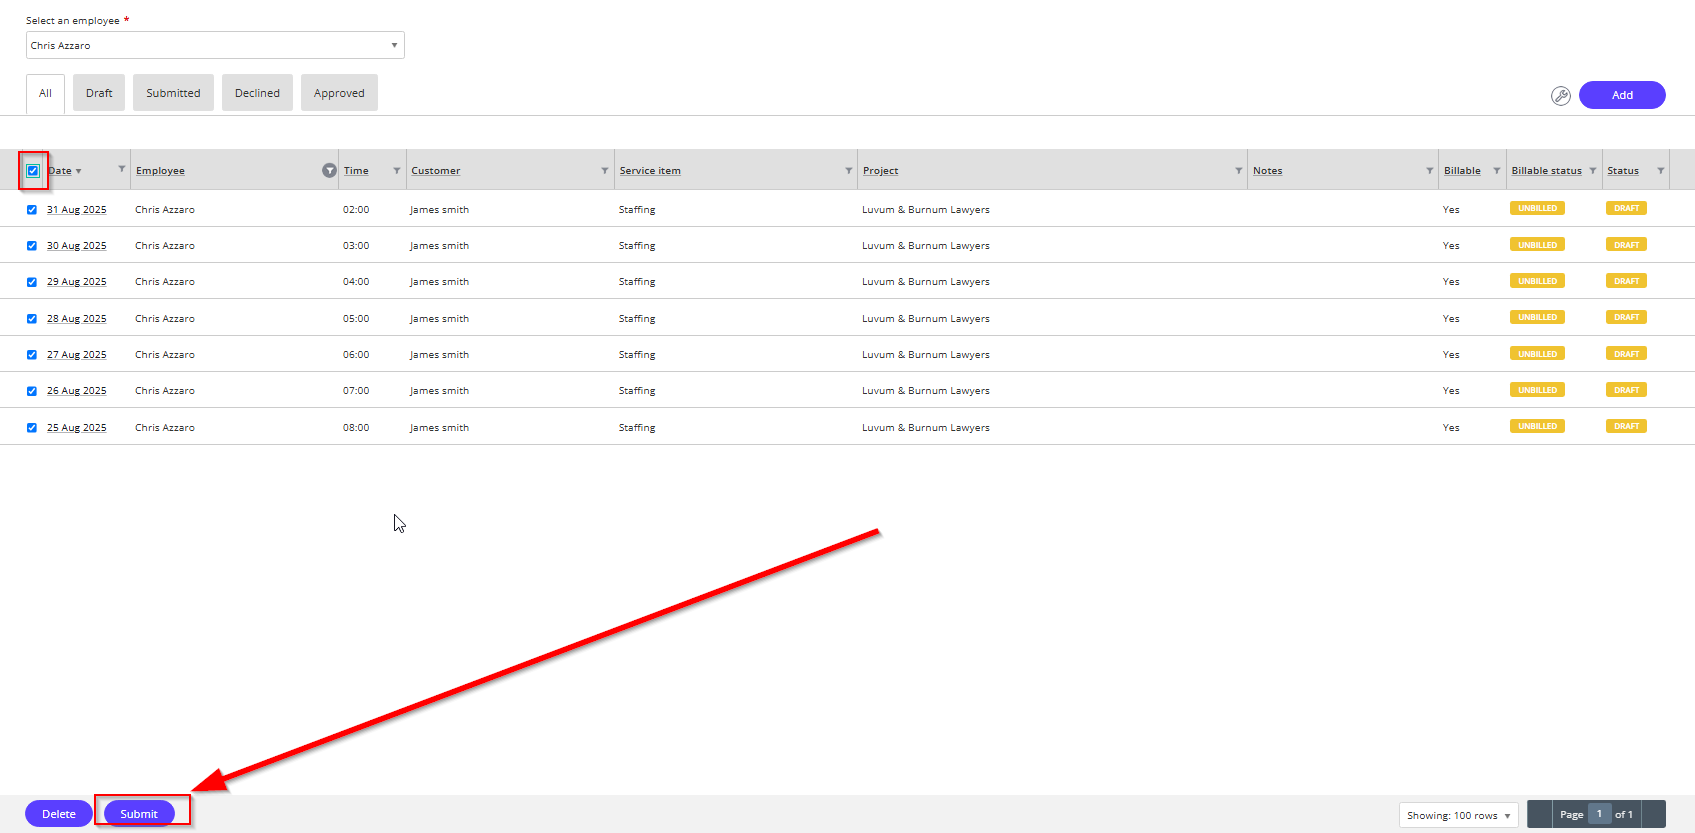
Submitting for Approval
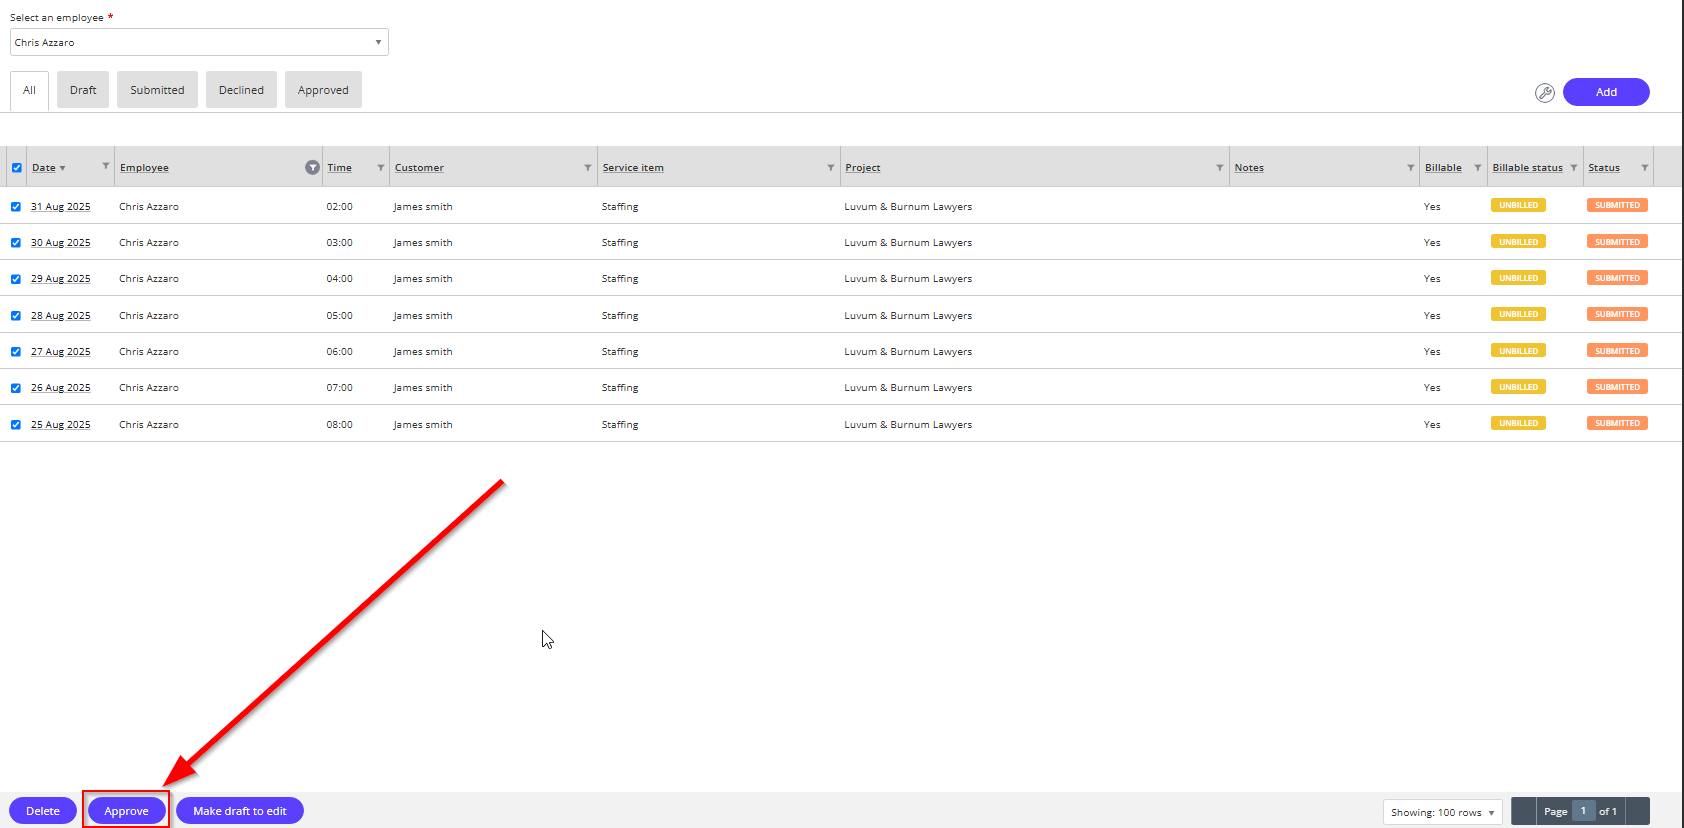
Once the Timesheets have been successfully created, we can submit it for approval that will allow it to appear in Timesheet data that can be imported into invoicing or used during pay run creation.
Also If you chosen to have the Approval process disabled it will affect the following:
- You will not be able to use Time entries for pay runs to track employees hours worked on a service.
- It will change the category for Timesheets any draft, submitted or approved timesheets will be now categorised as either Non-billable or Billable due to this change not including the hours worked for employees.
Importing time entries for invoices
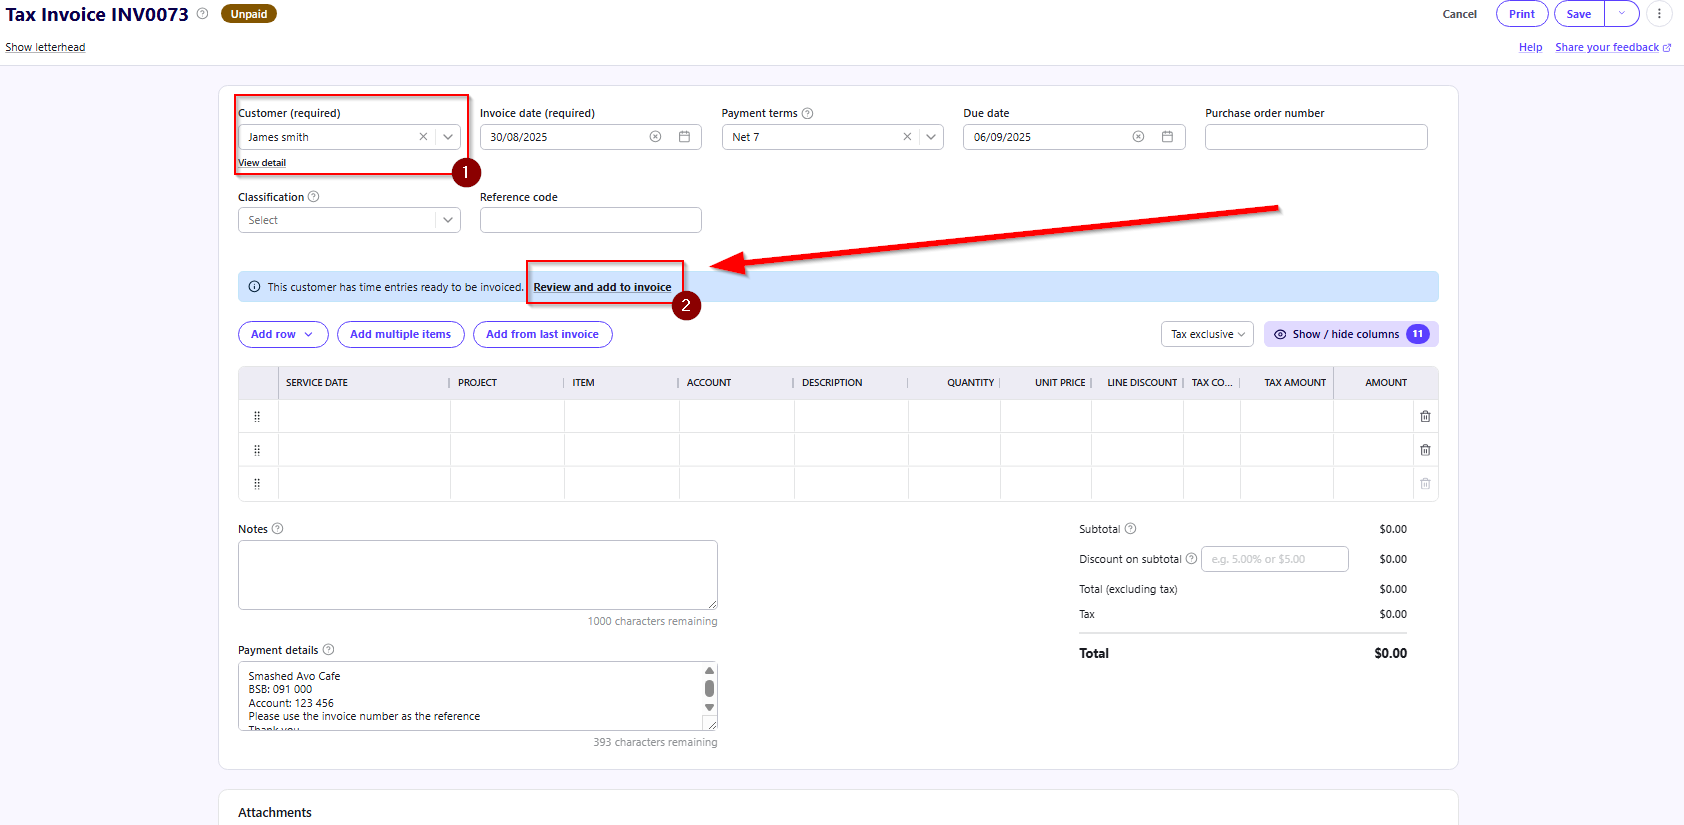
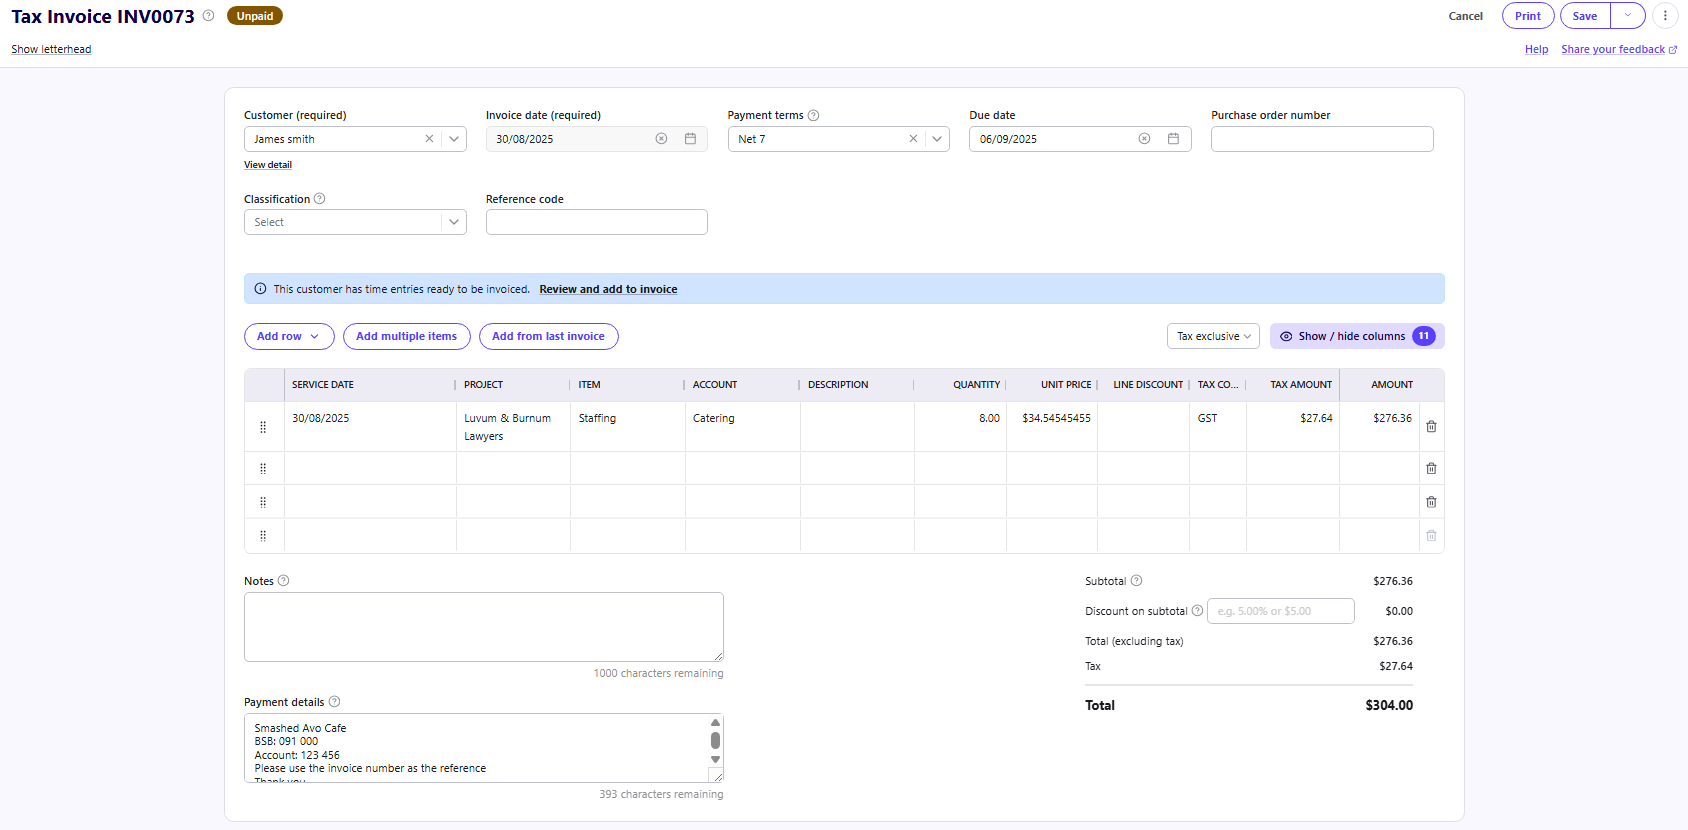
After the timesheets have been submitted and approved, when creating an invoice for the respective customer you will be prompted to add any available billable time.
Select the customer and add time entries:
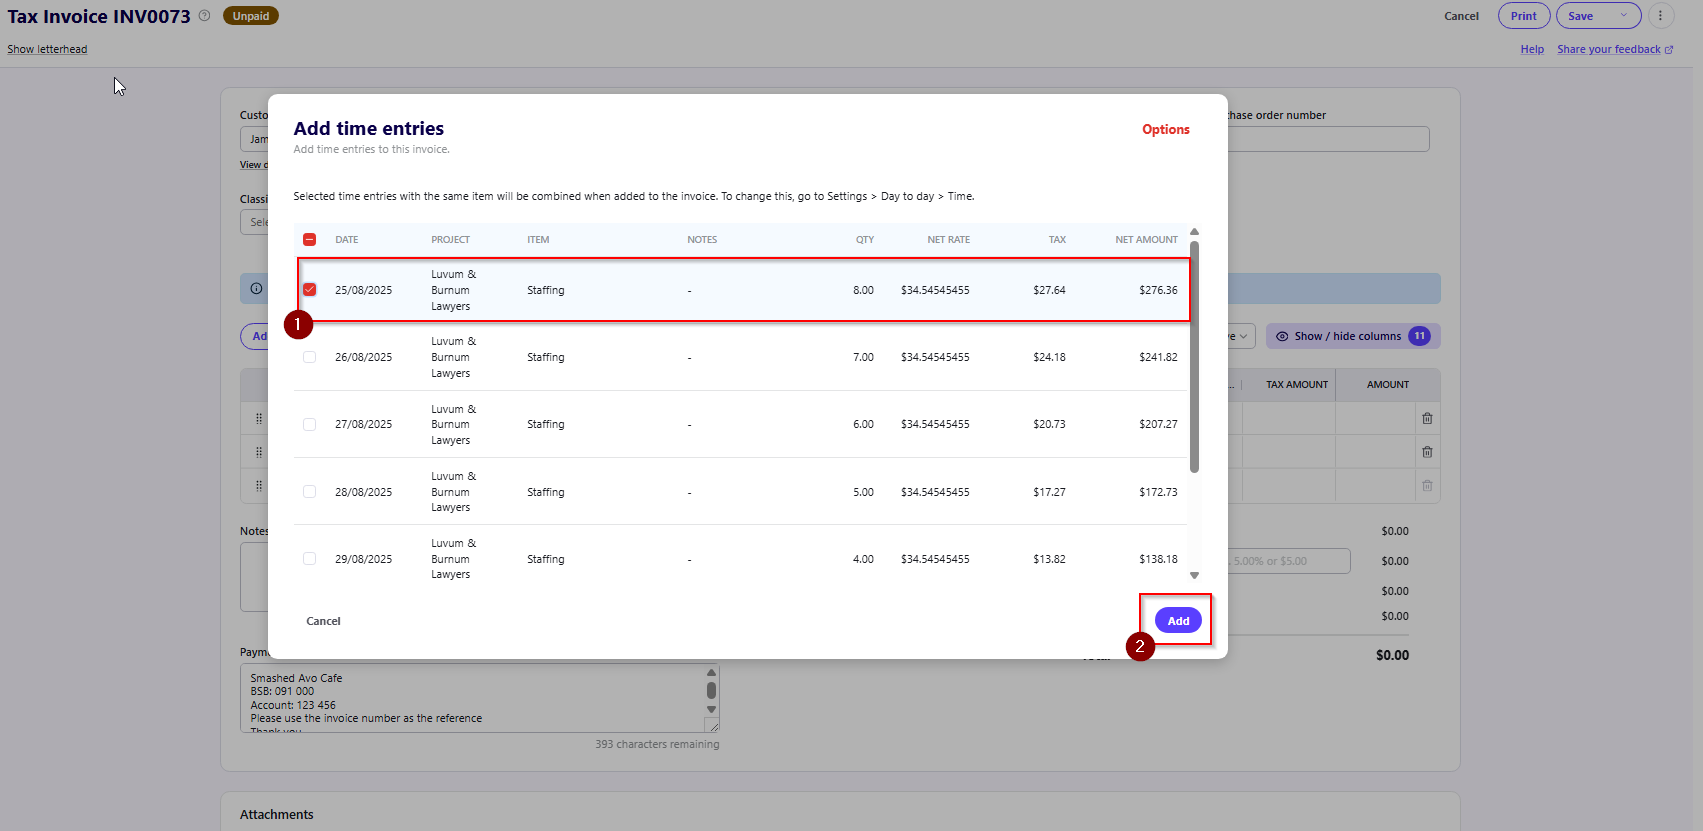
Note: You can add all entries and bill the customer for all hours worked at once.
Using Timesheet data to create pay runs
So we have billed the customer and now it's pay day for our employees, how can we use that Timesheet data you may be asking?
We start first by creating a new pay run and entering all information as usual but ticking the 'Use timesheet data to create pay run' option:
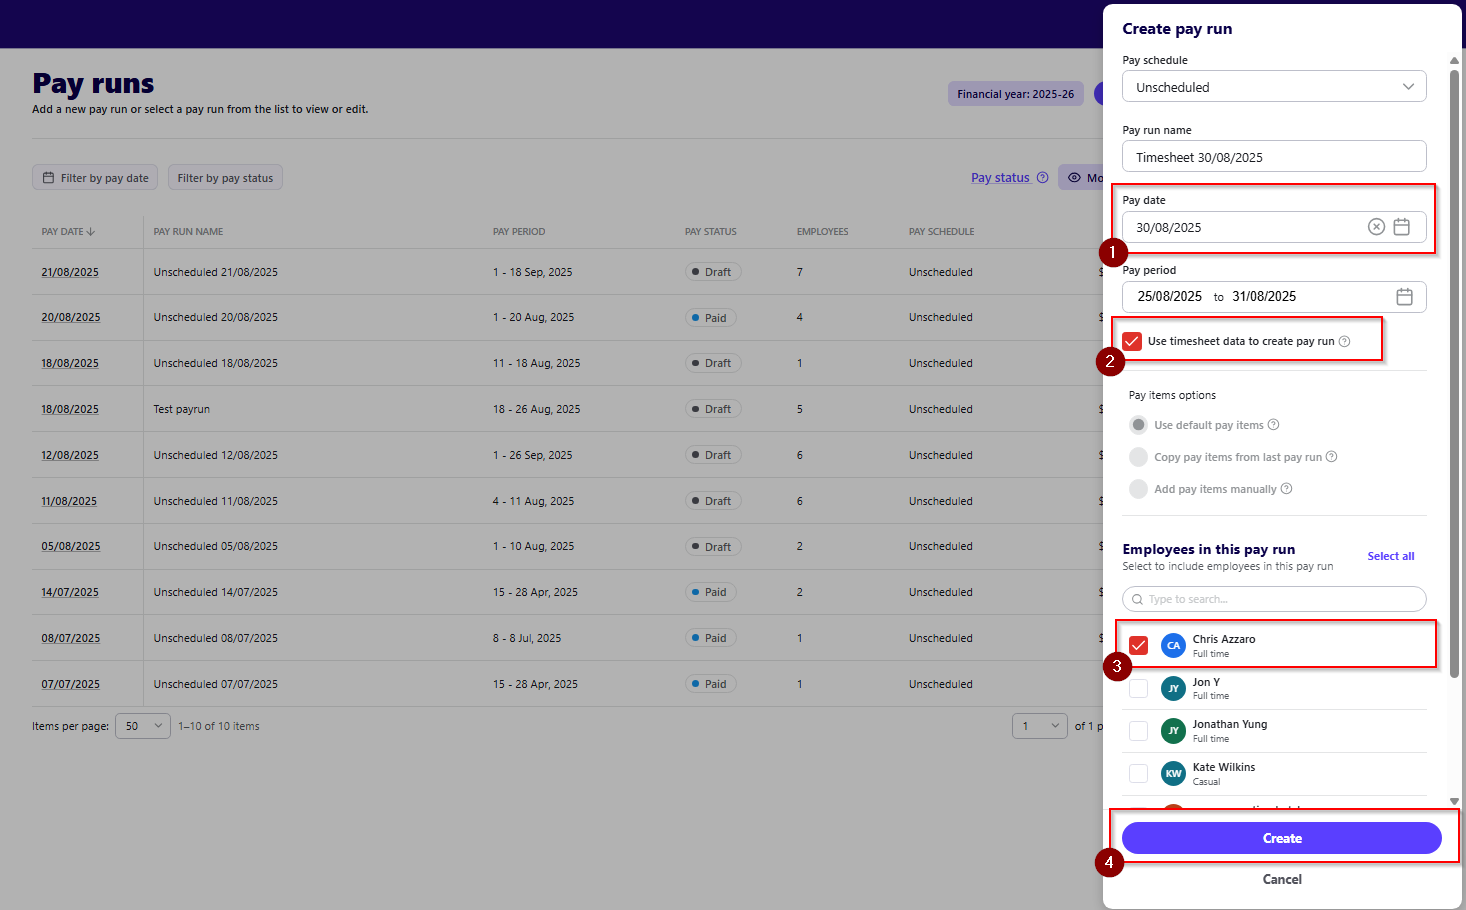
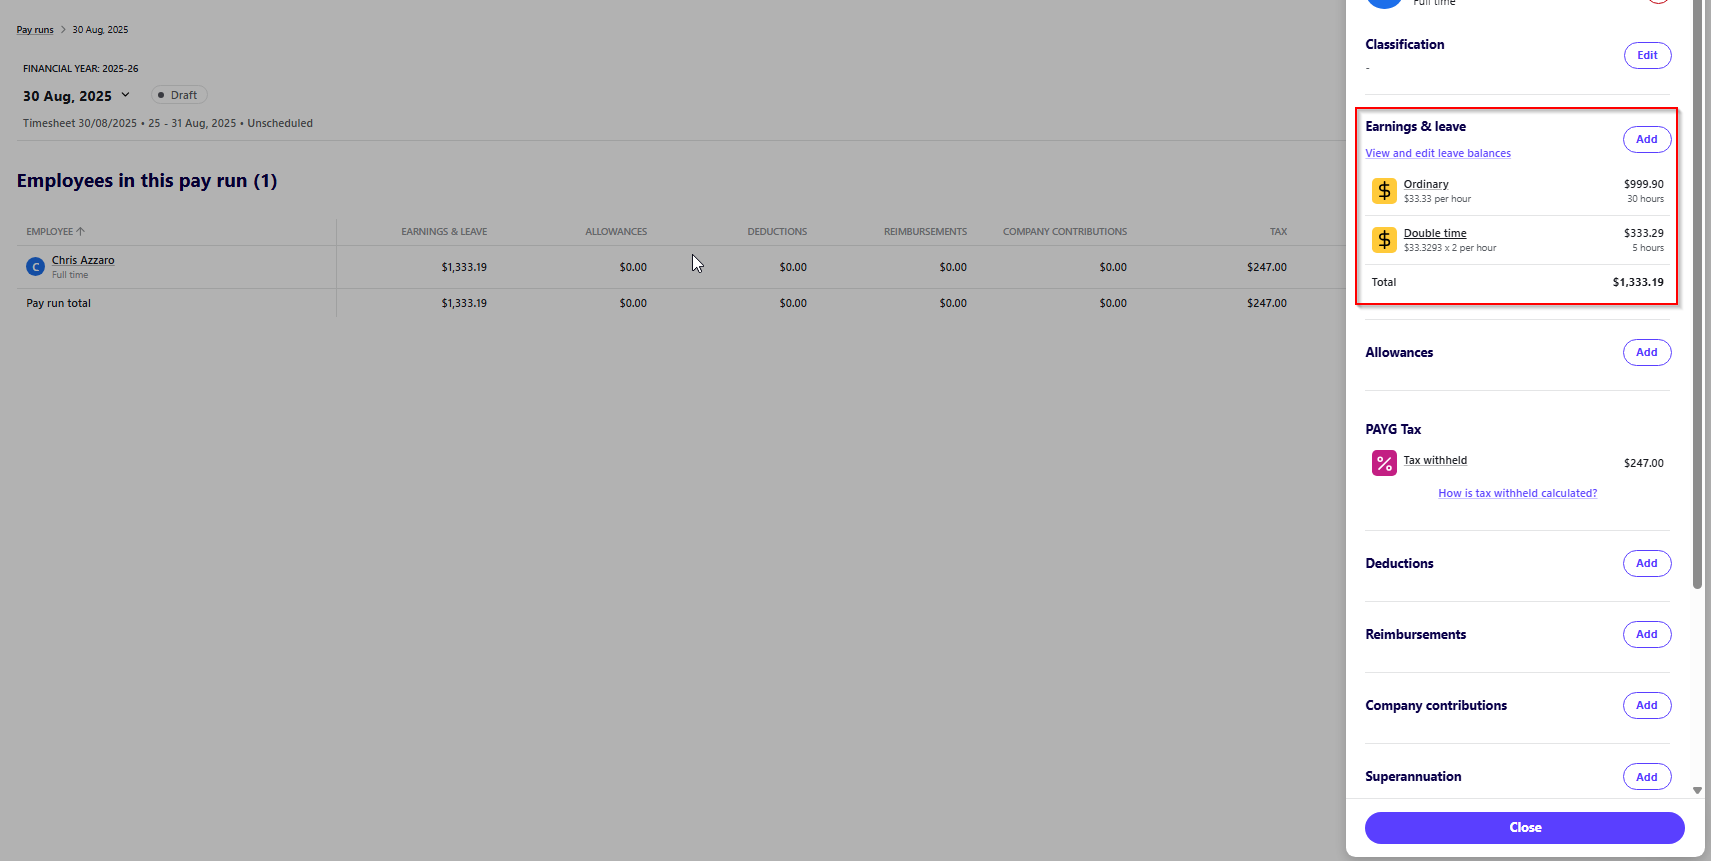
Once created the imported data is automatically going to use the pay items in the time entries with the amount of hours allocated:
I hope this helps you understand how Timesheets can be used to increase work efficiency and invoicing customers. If you would like a more extensive overview of how they can be used, check out our knowledge article which can provide further insight of the benefits of using timesheets.