Best Of
FirstChoice Employer Super Clearing House for Reckon Accounts Hosted users

The ATO’s Small Business Superannuation Clearing House (SBSCH) will close on 30 June 2026. If you currently rely on this service to pay employee super, you’ll need to move to a new clearing house before this date to stay compliant.
To support you through the change, Reckon has partnered with Colonial First State to offer Reckon Accounts customers free access to the FirstChoice Employer Super Clearing House - a simple, trusted alternative that works alongside your existing payroll process.
What this means for your business
Simply register with Colonial First State to activate your free access to FirstChoice Employer Super Clearing House. You have the option to use the fund as your default if you choose, but there is no obligation to switch – making the transition to Payday Super easy!
How it works
Paying super remains straightforward:
- Sign up as a participating employer with FirstChoice Employer Super to access the clearing house.
- Run payroll in Reckon Accounts as usual and export your SAFF file.
- Upload the file and make a single payment.
- CFS distributes payments to your employees’ super funds automatically.
Super made simple!
Why choose FirstChoice Employer Super Clearing House?
You can pay super with a single payment across multiple funds, with built-in checks to reduce errors and easy reporting. Plus, keep your existing default fund and be ready for Payday Super!
Register your interest
This offering will be available to Reckon Accounts and Reckon Accounts Hosted customers ahead of the SBSCH closure. Register your interest and we'll keep you updated.
 Rav
Rav
🔔 Get notified of the latest news & announcements for your Reckon software! 🆕

Hi everyone!
I know its super important to stay up to date with the latest news & announcements for your Reckon software. Its now super simple to stay notified of the latest important info for your specific Reckon software!
Simply hit the Follow button on our new dedicated announcements pages for your specific software (links below) and you'll automatically receive an email notification as soon as a new announcement is published!
Importantly, this is separate from regular posts on the Community so you & your inbox won't get overwhelmed, and its a great way to ensure you stay up to date with the latest news and important info as soon as it released! 🎉
How do I follow the new announcements page for my software?
Its really simple! Ensure you're logged into your Reckon Community account and head over to the dedicated announcements page for your software and click the Follow button.
📢 Reckon Accounts Hosted - Announcements
📢 Reckon Payroll - Announcements
📢 Reckon Accounts Desktop - Announcements
📢 Reckon One - Announcements
That's it! Its that easy! You'll receive an email notification as soon as a new announcement or article with important info is posted.
I'd highly recommend all of our members on Community to follow the new announcements page linked above so you're in the loop with the latest news.
Managing pages you follow
If you'd like to manage which pages you're following on the Reckon Community, simply head into your profile and select Followed Content on the right. You'll find a list of all Reckon software category pages you're following on the Reckon Community.
Rav
I need to create a post.. which category do I select?

Hey everyone!
When creating a new post, its really important that you select the correct category so its in the right place and reaches the right members in order to receive accurate, meaningful and timely responses.
The Reckon Community is organised into categories for each Reckon product and we've put together a quick little guide below to provide clarity on which category to select for your specific Reckon software when you're creating a new post.
Reckon Accounts Hosted
Using Reckon Accounts Hosted? Select the Accounts Hosted option.
Reckon Accounts Desktop
If you're using Reckon Accounts Desktop software such as Reckon Accounts Plus, Premier or Enterprise then select Reckon Accounts (Desktop)
Reckon One
Are you using Reckon One for payroll and now upgrading to the Reckon Payroll experience? Choose the Reckon Payroll selection from the list.
- For Reckon One queries that aren't related to payroll or the upgrade, select the main Reckon One category
Payroll Premier
Were you using Payroll Premier (Desktop) and now upgraded to Reckon One Payroll? Select the dedicated Reckon Payroll category for your post.
Reckon Payroll App
Have you been using the Reckon Payroll App for your payroll & STP and need to ask a question? Choose Reckon Payroll
Reckon Insights
Do you have a question about Reckon Insights? Select our Reckon Insights category when creating your post.
Personal Plus or Home & Business
If you're using Personal Plus or Home & Business, please ensure you select the Personal Plus and Home & Business category for your post
Do you have a question about, noticed a problem with, or have some feedback about the Reckon Community site itself? Let us know by creating a post and selecting the About Reckon Community category.
Rav
How to ask a good question on the Reckon Community 🙋♂️

Hey everyone!
Creating a good post or asking a good question on the Reckon Community is important so that you get helpful, relevant and timely responses. Here are some tips!
Search for existing posts & answers 🔍
Before posting your question, use the search function on the Reckon Community to see if a similar question has already been asked and answered. It's possible that someone else has faced a similar issue, and you can find a solution straight away. For details on how to search the Reckon Community click HERE.
Be clear, concise and provide context 😕
Make sure your post is clear and to the point but also has enough context for others to understand your problem. Its really important to include relevant details such as your Reckon software version, error messages, and any troubleshooting steps you've already taken.
Avoid unnecessary details or background information that aren't relevant to the question or issue which may confuse or overwhelm fellow members.
The title of your post should give readers a good idea of what the question or issue is about so ensure you give your post a descriptive title.
Choose the correct category for the software you're using 🗃️
🚨 Its really important that you select the right category for the Reckon software you're using in your post. 🚨
Some of our members and partners specialise in particular Reckon software over others so when creating a post, please ensure that you select the correct product category. This ensures that your question or discussion is directed to the most knowledgeable and relevant audience and helps streamline responses.
For a guide on which category to select, check out this post - I need to create a post.. which category do I select?
(Shoutout to @Bruce for the feedback on this! 🙌)
A picture paints a thousand words 🖼️
Screenshots are extremely helpful in understanding the context or issue of your query. Please include a screenshot(s) of any error messages or other relevant screens that are related to your query. For instructions on how to add a screenshot to your post, click HERE.
ℹ️ Please note, some screens can hold sensitive or personal information. Its your responsibility to obscure or hide any sensitive information in a screenshot or image before posting.
Follow Community Guidelines ✅
Most online communities, including the Reckon Community, have specific guidelines or rules for posting. Familiarize yourself with these guidelines and follow them to ensure your content is in line with the agreed community's standards. Click HERE to review the Reckon Community Guidelines.
A couple of other things..
After posting your question, stay engaged with the community. We love having you here! Jump in on other posts that you think you can contribute to.
It may take a little bit of time for community members to see and respond. Be patient and check back regularly for updates. You'll get an email notification as soon as a reply is made on your post. To review your notification settings, check out Notification Preferences in your Reckon Community profile.
Lastly, warm fuzzies go a long way and expressing gratitude is appreciated by everyone, so don't forget to say 'thank you' when a fellow Community member responds to help you.
These are just a few tips which can help you increase the likelihood of receiving meaningful and relevant replies when asking questions on the Reckon Community.
Rav
Getting started on the Reckon Community! 🚀

Welcome to the Reckon Community 👋
Hi everyone!
Thanks so much for taking the step to join the Community, its great to have you here! 🙌
I've put together some helpful tips and tricks on both navigating and using the Reckon Community platform effectively. Whether you're new to Reckon or a seasoned user, I hope you find the Community a valuable resource for getting answers to your questions and connecting with other Reckon users, Partners and staff 🙂
Finding what you're looking for 🔍
You'll find the search bar at the top of most our pages on the Reckon Community and its your best tool to find what you're looking for. Simply type in some keywords or phrase and the Community will present results best matching what you're looking for.
Click HERE for more info on searching the Reckon Community for existing posts.
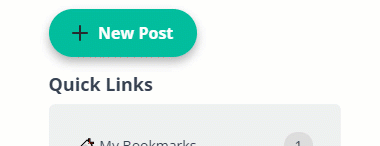
QUICK LINKS 🔗
You'll find your Quick Links on the right sidebar and its a handy way quickly access discussions that you've created yourself, discussions that you've bookmarked and drafts of discussions or comments that you've started creating but haven't published just yet.

RECKON SOFTWARE CATEGORIES 🗃️
The Reckon Community is organised by categories that relate to specific Reckon products. Each category houses discussions and other content that is specific to that particular product. This way you can view and participate in which the Reckon software category that you're interested in or relates to you.
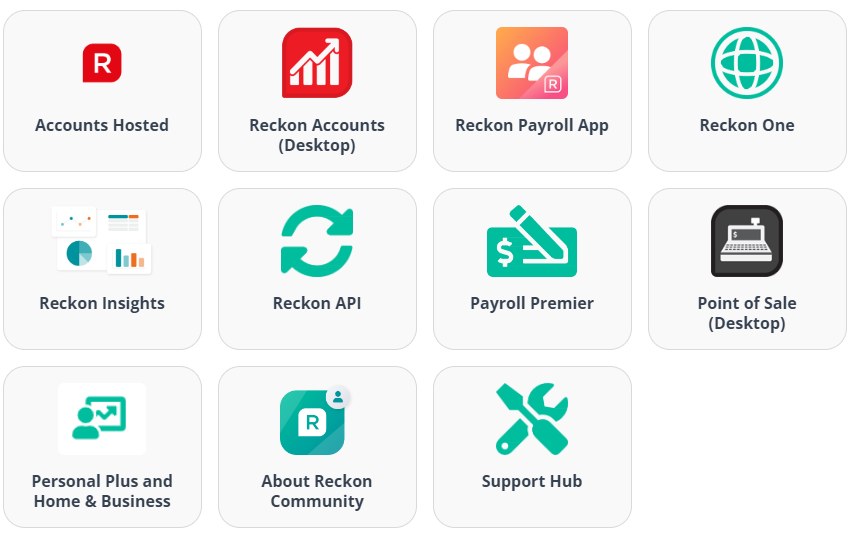
Check out the 'Explore all Reckon Software' page to see all software categories.
If you're unsure which category you should select for your particular Reckon software, check out our guide here - Which category do I select?
FOLLOW A CATEGORY YOU'RE INTERESTED IN 🔔
If you're interested in a specific Reckon software and want to follow the Community activity for it you can do so by following it!
To follow a category, simply click the Follow icon and select the follow option. You'll then see discussions only from that category in your My Followed Feed on the home page!
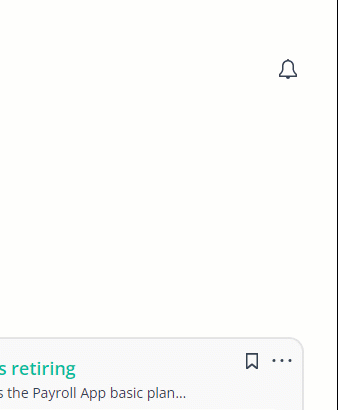

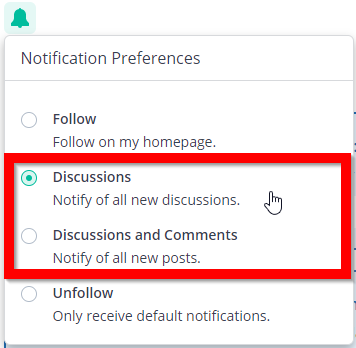
RECEIVE NOTIFICATIONS FOR CATEGORIES YOU FOLLOW 📨
Want to stay on the pulse with what's happening on the Community for a software you're interested in? You can opt to receive email notifications when there is new activity posted in the category by fellow Community members.
Simply select whether you'd like an email notification any time a new discussion is created in your chosen Reckon software category or if you'd like an email notification each time a new discussion and comment is made. This will also automatically add the chosen category to your My Followed Feed on the home page.
⚠ Just a word of warning, if you select the Discussions and Comments option you'll receive an email each time a new discussion AND/OR comment is created in that category which may become overwhelming to both you and your inbox. I'd recommend sticking with the 'Discussions' option.
BOOKMARKING POSTS 🔖
If you're interested in a particular discussion and want to save it so you can either refer to it later or easily follow the activity on it, you can bookmark it!

Simply click the bookmark icon in the top right of an individual discussion and it will be saved your bookmarks. You can then access it from the My Bookmarks option in your Quick Links.
How to participate in the Reckon Community ✍
STARTING A NEW DISCUSSION
We'd love to see you jump in and participate! To create a new discussion on the Reckon Community click on the New Post button and select 'New Discussion'.

Start creating your discussion by first selecting which Reckon software category it belongs in using the Select a Category option ie. which Reckon software your discussion relates to.
Give your discussion a clear, easy to understand title in the Discussion Title field then add the main content of your post below that.
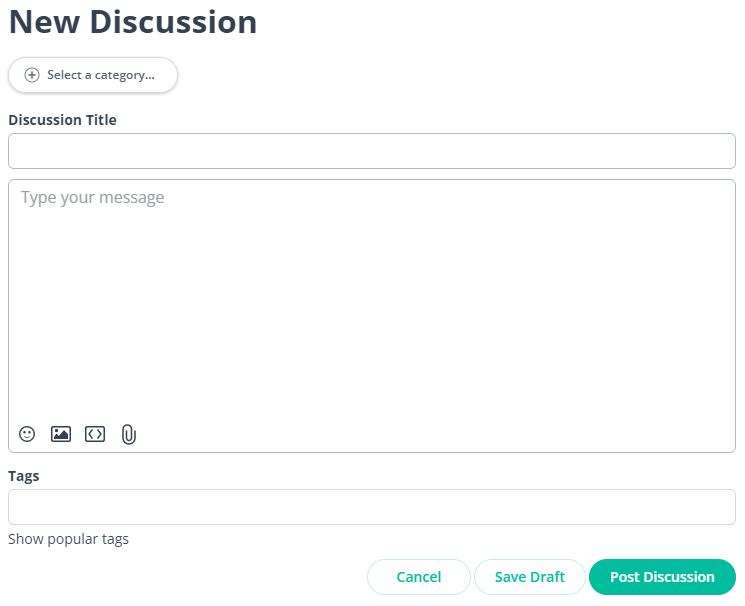
I highly recommend that you add lots of detail to your post so that its easy for fellow Community members to understand. If you're contending with an error or issue, please outline the specific nature of it including screenshots where possible.
As they say, a picture is worth a thousand words.. Adding an image such as a screenshot is super easy, just drag your image into the main content field or use the image upload button, check out more info here - How do I add an image or screenshot to my discussion?
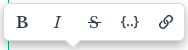
You can make the content of your post even more dynamic through text styling, headings, bullet or numbered lists.. you can even add emojis! 😍

When you're happy with your post, click on the Post Discussion button and it'll be published to the Community! If you'd like to save your draft to post later simply click the Save Draft button.

ASKING A QUESTION
To ask a question, simply follow the same steps above, however select the Ask a Question option from the New Post button.
Creating your post as a question gives you the option to mark whether a reply you receive has answered your question and it will displayed as the Best Answer directly below your question when done so.
REPLYING TO EXISTING POSTS
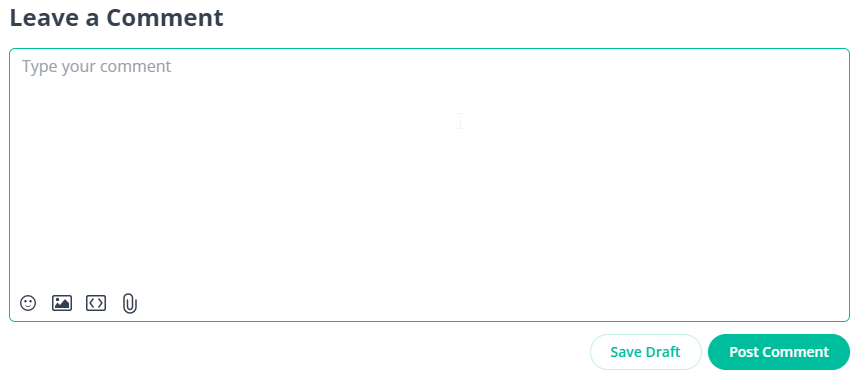
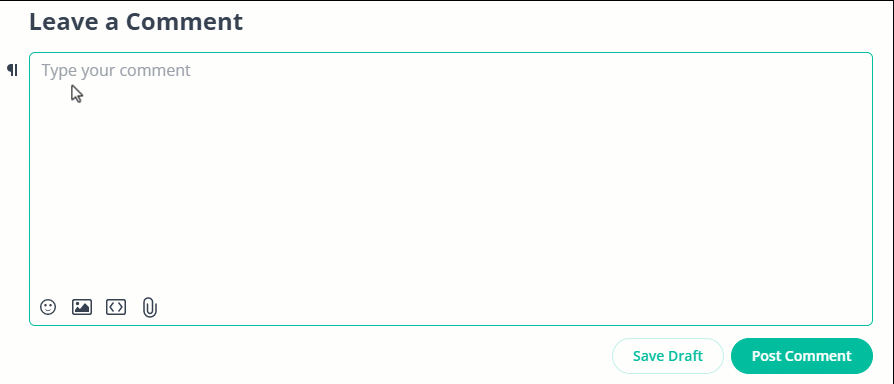
Replying to an existing discussion is a great way to get involved! Simply click on a discussion you want to participate in and add your reply in the Leave a Comment field. Once you've finished, click Post Comment and your reply will be published!
If you responding to a specific comment or post, click on the Quote button. This will add that specific comment to your reply and also notify that fellow member that you responded to them.
@MENTIONING FELLOW MEMBERS
You can also @mention fellow members in your posts by entering @ then their Community user name and select them from the list. Mentioning a fellow Community member is a great way to respond to them or even attract their attention to a discussion you think they might be able to assist in.
REACTING TO A POST OR COMMENT
If you liked a particular post or comment or it helped solve a question or issue you had, give it a reaction and let the community member know! Its a great way to say thanks and share your appreciation for their input.
Rav
How do I search for existing posts related to a specific product? 🔍

How do I search the Reckon Community for existing posts related to specific products or categories?
Searching the Reckon Community is a great way to find existing posts or questions that have previously been created by fellow members. You may even find the answer to a question or topic that you're currently contending with that has already been answered or discussed! 😊
To start searching, enter some specific keywords relating to your query in the search bar then hit the Search button or simply press enter. A list of search results best matching your keywords will appear which you can browse and select from.
The best method though is to customise your search results for the Reckon product or category that is relevant to you by using the category filter.
Filter search results for your Reckon product
A really useful tip is to filter your search results by the product or category that is relevant to you/your query. You can do this by clicking the 'Discussions' option and then use the 'Category' list to select your Reckon product category. This will make your search results more relevant and specific to you by filtering existing posts for the relevant product only.

You can also user other filters such as date range, author, title and tags to drill down even further.
In a hurry? Use Smart Search!
As you start typing in keywords that are relevant to your query in the search bar, you'll be presented with suggestions that best match from all conversations and categories across the Community immediately in the list on-screen. Smart search will update the suggested list dynamically as you type.
 Rav
Rav
Creating a custom super item in Reckon Payroll Web

Creating a custom super item in Reckon Payroll Web
You have the ability to create various superannuation-type items in Reckon Payroll. The available superannuation types are;
- Super Guarantee
- Employer Additional
- Productivity
- Collective Agreement
- Salary Sacrifice
- Member Voluntary
- Spouse Deduction
Creating a new Custom Super Item
- To create a new custom super item go to Settings ➡ Pay Items ➡ Create Pay Item ➡ Select superannuation from the list
- Select the superannuation type you wish to create eg. Super Guarantee, Employee Additional etc.
- Give the new super item a relevant and easily identifiable name and description
- Select the expense account for the super item
- Select the rate basis you want this item to calculate super on. You can select from the following options; Statutory Rate, Fixed Amount or Percentage of Earnings
- Click on Pay preferences to select the pay items that your new super item needs to calculate super on. Simply tick which earnings, leave, allowance or deduction items that you would like the custom super item you are creating to calculate super on when its used in a pay run.
- After the super item is set up, you will then need to assign it to the employee superannuation fund. Check out our 'Creating and assigning a super fund' guide for more info.
IMPORTANT!
You must assign which pay items you would like your custom super item to calculate super on. Super will NOT be calculated if the super item is not linked to the pay item used in a pay run.
Check out the short video demo below on creating a custom super item in Reckon Payroll Web
Rav
Creating an employee super fund in Reckon Payroll Web

Creating a super fund and assigning it to an employee
An important part of the payroll process is the ability to assign your employee's choice of superannuation fund.
You can now set up Australian Prudential Regulation Authority (APRA) and self-managed type super funds in the Reckon Payroll App (Web Access).
We have broken down this down into 2 really easy steps:
- Set up the Superannuation fund
- Assign the super fund to the employee
Setup superannuation funds
This is the superannuation fund (i.e. CARE, REST, Australian Super) which you pay the employee's super into.
To setup a superannuation fund go to Settings ➡ Superannuation Funds.
- Click on the 'Create Superannuation Fund' button and select whether the super fund is an APRA regulated fund or an Self Managed Super Fund (SMSF)
- Display Name - Enter a display name for the super fund
- Fund Name - As you type in the fund name you'll be presented with a list of options to select from for the super fund and its respective fund products. Select the most appropriate option for your fund.
You can request adding your super fund if its not present in the search list.
Check out the short video example below on how to setup a super fund and also how to submit a request for a missing super fund -
Assign the superfund to your employee
After you have set up the superfund, you will then need to assign it to the employee. This is where you select the superfund product and super items for the employee to be used in pay runs.
To assign a super fund edit the Employee ➡ Other Details. Select the superannuation fund from the list then select the associated fund product. Enter the member number (mandatory) and a date when the employee joined the super fund.
The default 'system' superfund is automatically assigned to all employees created in Reckon Payroll which can be removed after you've assigned a specific superfund to the employee.
Check out the demo video below to learn how to assign a superfund to an employee -
Congratulations! You've successfully created a super fund and have assigned to your employee.
Rav
Reckon Community: Receiving email notifications for categories I'm interested in

Email Notifications from the Reckon Community!
In addition to the general notification settings in your Community profile you can also receive email or pop-up notifications each time there is a new discussion, or even comment, posted in a particular Reckon software category that you might be interested in.
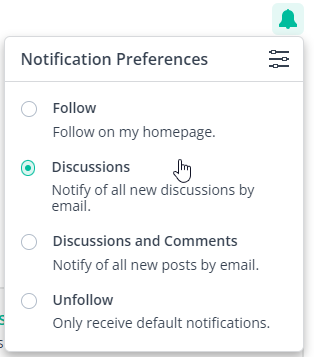
For example, if you want to be notified by either email or pop-up when a new discussion is created about Reckon Accounts Hosted or the Reckon Payroll App etc all you need to do is go that particular category that interests you and click on the bell icon at the top of the page then you can select the 'Discussions' notification option.
Discussions
If you select the 'Discussions' option you will receive a notification each time a new discussion is created in the chosen category.
Discussions and Comments
If you select the 'Discussions and Comments' notification option you will receive a notification each time a new discussion AND new comment is posted in the chosen category.
⚠ Just a word of warning, if you select the 'Discussions and Comments' option you'll receive notifications each time a new discussion AND comment is created in that category which may become overwhelming to both you and your inbox. I'd recommend sticking with the 'Discussions' option.
Rav
How do I add an image or screenshot to my discussion?

Adding a screenshot or image is a great way to add visual context to your discussion.
It can also be extremely helpful to add when you've run into an issue that requires troubleshooting so that fellow Community members can see where things have gone astray, and in turn hopefully lead to a solution faster.
Adding a screenshot or image to your discussion is super easy and you have a couple of ways to do so. We'll start with the easiest way first.
1️⃣ Drag & drop
If you have an image file saved to your PC that you'd like to include in your post you can simply drag the file into the conversation field and the Community will process and add the image to your discussion.

2️⃣ Upload image
You can also use the 'Upload Image' button from the options at the bottom of the conversation field. This will open a window which will allow you to find and select an image file from where its saved on your PC.

🖱️Adjusting the size & position of your image
There are options to adjust the size and position of your image so that you can tailor the look & appearance of your discussion. To do so, click on the image itself once its uploaded, you will options to adjust the position to the Left, Centre or Right and for sizing, the Community can adjust it to Small, Medium or Large.
Please note: The results you receive using these options are dependent on the dimensions of the original image uploaded.
 Rav
Rav